Xamarin Forms – A guide to build your first Xamarin project
You want to create a mobile multi platform app and you really like C#.Xamarin is the perfect solution for you and if you don’t have any major experience with native mobile development, Xamarin.Forms is just a day-dream.So let’s see how we can create our first Xamarin.Forms projects and how it works.
Create the Project
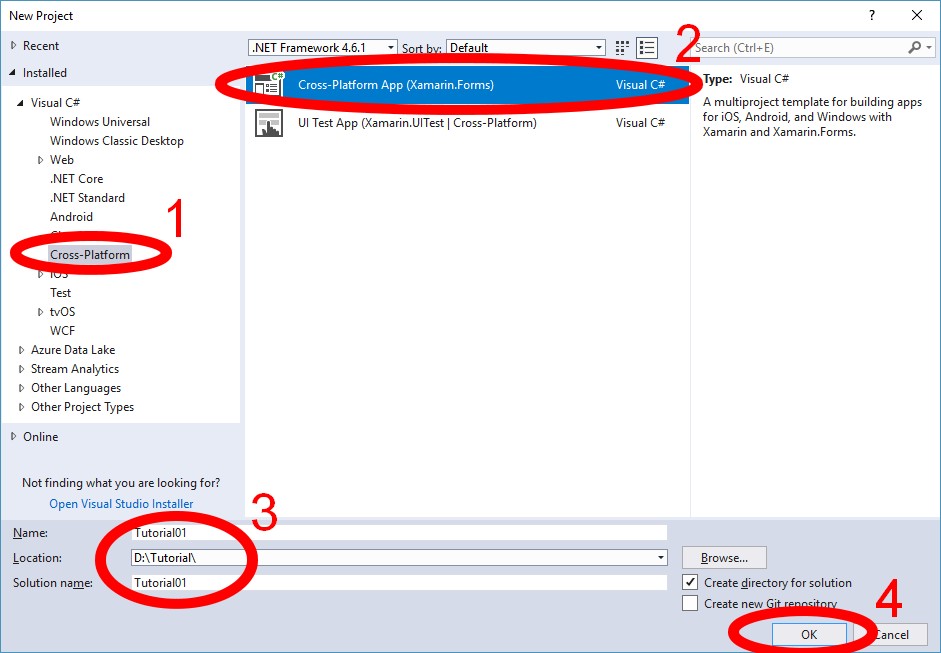
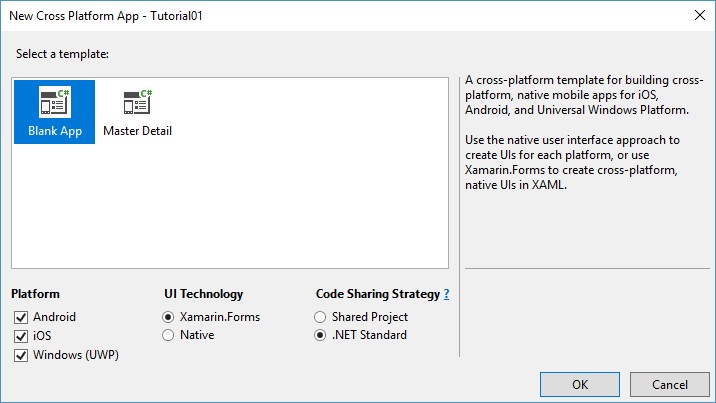
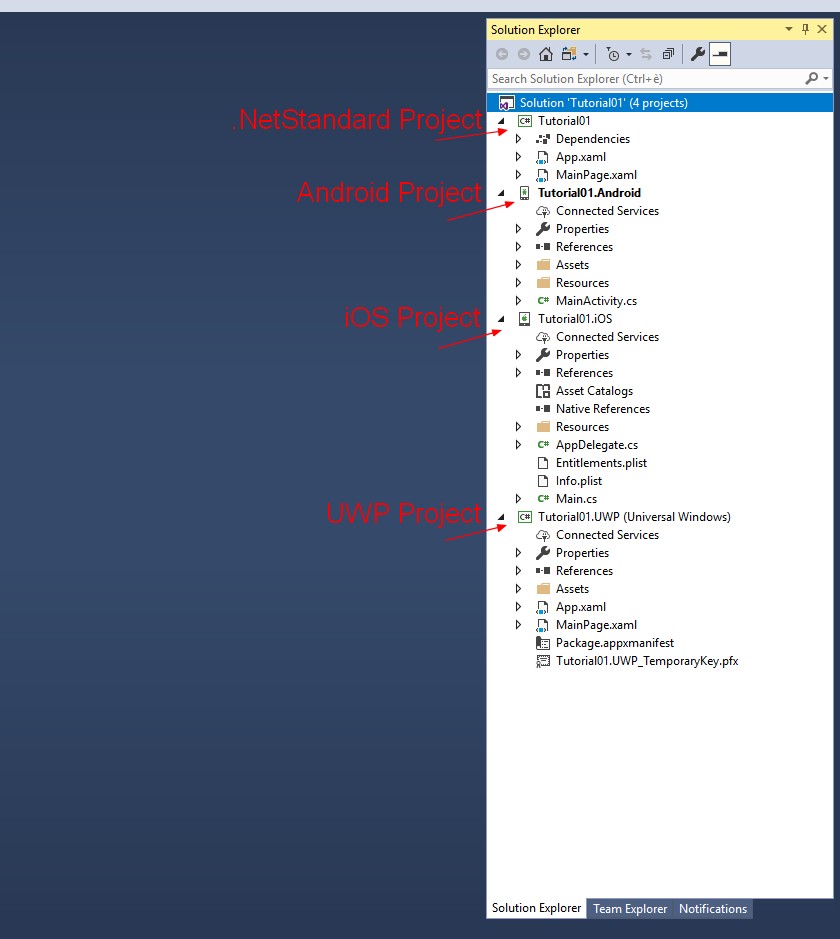
From Visual Studio 2017 create a New project…Under “Visual C#” select “Cross-Platform” (1) then select “Cross-Platform App (Xamarin.Forms)” (2), choose name and location for your project (3) and press Ok (4).Now we need to configure our project. In this case we start with a Blank app that is perfect to explain how a Xamarin.Forms solution works. Under Platform choose the platforms you need. In this case I’ve chosen Android, iOS, Windows (UWP). Under UI Technology select Xamarin.Forms and under “Code Sharing Strategy” choose .NET Standard.After we press ok, Visual Studio will take several seconds (or minutes according to your machine) to create your solution.Inside the Solution Explorer we see now that we have a .NET Standard project (our common library, where we are going to write almost all our code), and Android project, an iOS project and a UWP project. The projects are already working so if we try to run one of the projects (Android, iOS, UWP) this is what we get:That’s brilliant, few second and we already have a working project for Android, iOS and UWP.Now it’s time to understand how a Xamarin.Forms project works so we are going now to analyze the projects we have in our solution.
.NET Standard
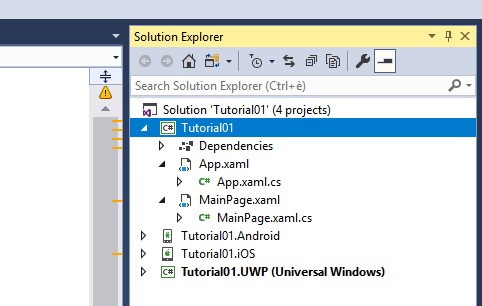
This is common project shared by all the other projects. It’s here that we are going to write our app. Here we write the UI and the logic and if our project it’s easy enough, we don’t need to write code in the other projects of our solution.Inside our project there are 2 file, App.xaml and MainPage.xaml. App.xaml is the entry point of our .NetStandard project. From this file Xamarin loads the first Page of the app and usually we initialize other parts of the project like Resources, Databases and so on.Now let’s see the structure of the code-behind file App.xaml.cs
using Xamarin.Forms;

namespace Tutorial01
{
    public partial class App : Application
    {
        public App()
        {
            InitializeComponent();
            MainPage = new Tutorial01.MainPage();
        }

        protected override void OnStart()
        {
            // Handle when your app starts

        }

        protected override void OnSleep()
        {
            // Handle when your app sleeps
        }

        protected override void OnResume()
        {
            // Handle when your app resumes
        }
    }
}
Inside the constructor we initialize the XAML file with “InitializeComponent()” and load the first page with “MainPage = new Tutorial01.MainPage();”.As you have seen, MainPage is the actual page displayed on-screen, so every time we want to change a page, we need to assign a new value to MainPage (We’ll see that there are also other ways to do it).OnStart is called when the app is started. OnSleep and OnResume are called every time the app appears and goes in background.Now it’s time for the MainPage file. This is the page that will be displayed when we will launch the app. This is the XAML file:
<?xml version="1.0" encoding="utf-8" ?>
<ContentPage xmlns="http://xamarin.com/schemas/2014/forms"
             xmlns:x="http://schemas.microsoft.com/winfx/2009/xaml"
             xmlns:local="clr-namespace:Tutorial01"
             x:Class="Tutorial01.MainPage">
    <Label Text="Welcome to Xamarin.Forms!"
           VerticalOptions="Center"
           HorizontalOptions="Center" />
</ContentPage>
What we have here is a ContentPage and inside a single element, a Label with text (“Welcome to Xamarin.Forms!”) and alignment options, so where are saying that we want to show that text at the centre of the screen (we have seen it before).And this is the code-behind file:
using Xamarin.Forms;

namespace Tutorial01
{
    public partial class MainPage : ContentPage
    {
        public MainPage()
        {
            InitializeComponent();
        }
    }
}
We see that MainPage inherits from a ContentPage (as the XAML file) and inside the constructor we need to call InitializeComponent to load the XAML file.Because the app does nothing, this file is basically empty otherwise here you can add the logic of your page (unless you want to follow an MVVM approach…I’ll add a link here as soon as the MVVM guide is ready).
Android Project
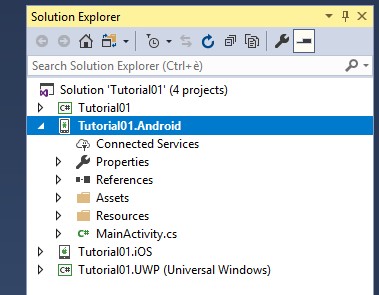
Let’s see the structure of the project:Inside the Resources folder you will add all your resources like images, styles and native layouts.MainActivity is the entry point of your Android app:
namespace Tutorial01.Droid
{
    [Activity(Label = "Tutorial01", Icon = "@drawable/icon", Theme = "@style/MainTheme", MainLauncher = true,
        ConfigurationChanges = ConfigChanges.ScreenSize | ConfigChanges.Orientation)]
    public class MainActivity : global::Xamarin.Forms.Platform.Android.FormsAppCompatActivity
    {
        protected override void OnCreate(Bundle bundle)
        {
            TabLayoutResource = Resource.Layout.Tabbar;
            ToolbarResource = Resource.Layout.Toolbar;
            base.OnCreate(bundle);
            global::Xamarin.Forms.Forms.Init(this, bundle);
            LoadApplication(new App());
        }
    }
}
Inside the method OnCreate we need to initialize Xamarin.Forms and load the .NetStandard project.Usually you don’t have to edit this file unless you have to load external plugins or intercept events like OnActivityResult (when you launch another activity, after it terminates you’ll get the result here) or OnResume (when the app goes in foreground).
iOS Project
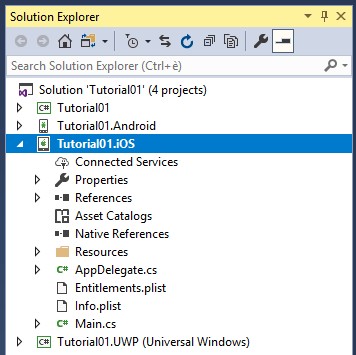
Let’s see the structure of the project:Inside the Resources folder you will add all your resources like images or storyboards (you are not going to use them in Xamarin.Forms).The AppDelegate file is the entry point of your iOS app:
namespace Tutorial01.iOS
{ // The UIApplicationDelegate for the application. This class is responsible for launching the
    // User Interface of the application, as well as listening (and optionally responding) to
    // application events from iOS.
    [Register("AppDelegate")]
    public partial class AppDelegate : global::Xamarin.Forms.Platform.iOS.FormsApplicationDelegate
    {
        // This method is invoked when the application has loaded and is ready to run. In this
        // method you should instantiate the window, load the UI into it and then make the window
        // visible.
        //
        // You have 17 seconds to return from this method, or iOS will terminate your application.
        //        public override bool FinishedLaunching(UIApplication app, NSDictionary options)
        {
            global::Xamarin.Forms.Forms.Init();
            LoadApplication(new App());
            return base.FinishedLaunching(app, options);
        }
    }
}
Inside the method FinishedLaunching we need to initialize Xamarin.Forms and load the .NetStandard project.Usually you don’t have to edit this file unless you have to load external plugins.
UWP Project
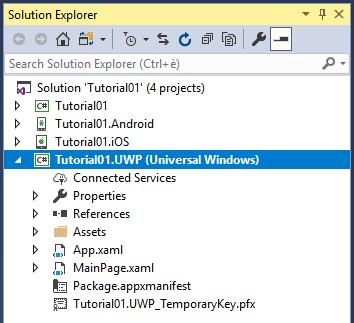
Let’s see the structure of the project:This project seems a bit more complicated as it has two file: App.xaml and MainPage.xaml. In UWP, Xamarin.Forms is initialized inside the App.xaml file.
protected override void OnLaunched(LaunchActivatedEventArgs e) {
    Frame rootFrame = Window.Current.Content as Frame; // Do not repeat app initialization when the Window already has content,
    // just ensure that the window is active
    if (rootFrame == null) {
        ...
        Xamarin.Forms.Forms.Init(e);
        ...
    }
    ...
}
There is a lot of code but don’t worry, probably you will never have to edit it. The only thing to remember is that here the Xamarin Forms library is initialized.The MainPage.xaml is extremely simple:
namespace Tutorial01.UWP
{
    public sealed partial class MainPage
    {
        public MainPage()
        {
            this.InitializeComponent();
            LoadApplication(new Tutorial01.App());
        }
    }
}
The only thing we do here is to load our .Net Standard project.
Recap
During this tutorial we have seen the structure of a Xamarin.Forms project: When we create a new Xamarin.Forms project, Visual Studio creates for us:
- .NetStandard project where we write the logic and the UI of our app
- a project per each platform we want our app on.
We need to write code in these platform projects only if we need to initialize a plugin, write a custom renderer (I’ll write a tutorial for Custom Renderers) or in general write code for a particular platform.
June 1, 2019 @ 6:28 pm
Ciao, scusa se scrivo qua ma non ho trovato un’email dove contattarti direttamente.
Grazie per il tuo bel blog, se posso…mi piacerebbe darti qualche suggerimento…
Innanzitutto sarebbe apprezzabile averlo in lingua italiana (dato che in inglese ce ne sono già moltissimi). So che l’inglese è fondamentale per il nostro lavoro, e ci mancherebbe, ma aiuterebbe chi già deve cercare di capire le dinamiche di xamarin a non preoccuparsi di un ulteriore livello di complessità aggiunto dalla lingua
Inoltre sarebbe interessante se ti dedicassi alle problematiche più complesse, magari associate a qualche semplice esempio su github..per la serie meno post, ma più approfonditi.
Dato che secondo me il vero tallone d’Achille di xamarin (oltre alla verbosità ) è dato dalle sofferenti performance su Android, secondo me sarebbero di aiuto dei tutorial atti a mitigare questa problematica:
– (Performance) le risorse grafiche: che strumenti usare e le giuste specifiche da rispettare per evitare di rendere inutilmente pesante l’applicazione (dpi, risoluzioni obsolete, ottimizzazione png, etc etc)
– (Performance) Android: come ‘attenuare’ il problema dei tempi di avvio dell’applicazione (AndroidEnablePreloadAssemblies, Aot, etc)
– (Performance) Android e iOS: il modo giusto per caricare i dati da webservices, senza appesantire inutilmente la user interface (lazy loading)
– (Performance) Android: Esempio di una listview/collectionview con decine di elementi, con un template di un paio di custom cell, che sia esteticamente carina (material design) ma che, innanzitutto, non sia ‘laggosa’ nello scrolling
– (Debug) AppCenter di microsoft: come integrarlo nell’app e come creare un wrapper per ‘automaticamente’ loggare tutte le eccezioni su AppCenter quando si è in release, mentre fare delle Debug.Write.. quando si è in debug
Grazie!
June 3, 2019 @ 12:03 pm
Ciao Matteo,
Grazie mille per il tuo feedback.
Questi feedback sono davvero utili per me per migliorare questo blog e i miei plugin.
Come puoi immaginare ho scelto la lingua inglese dal momento che e’ la lingua universale della programmazione, ma indubbiamente potrebbe essere interessante utilizzare anche la lingua italiana dal momento che Xamarin si sta diffondendo anche nel nostro paese.
I post che mi hai suggerito sono davvero interessanti per cui iniziero’ dal primo (Performance e risorse grafiche) e man mano creero’ il resto, ora studiero’ il modo migliore per utulizzare sia la lingua inglese che la lingua italiana (un altro blog o magari un blog multilingua).
Grazie ancora e ti prego di segnalarmi ogni suggerimento per tutorial, plugin o altro per migliorare la diffusione e comprensione di Xamarin nel mondo e soprattutto in Italia.
Con affetto,
Marco
June 3, 2019 @ 4:05 pm
Grazie a te per il bel blog 🙂